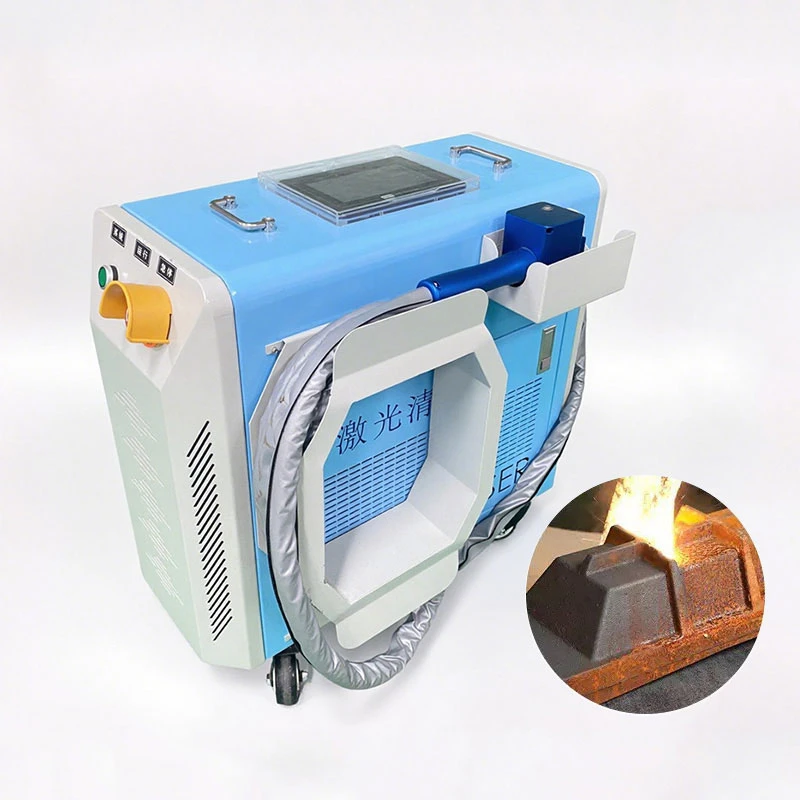
Troubleshooting and Simple Handling Methods for Common Faults in Laser Cleaning Machines
Laser cleaning machines operate in dusty and oily environments such as mold workshops and heavy industrial areas. Occasionally, due to consumable wear and tear, improper operation, and environmental factors, malfunctions such as insufficient output, no laser beam, high-temperature alarms, and abnormal laser spots may occur. Most minor issues do not require professional disassembly; operators can quickly troubleshoot and resolve them on-site by following standardized procedures, minimizing production line downtime. This article, based on the scenario of mold laser cleaning, summarizes frequently occurring malfunctions, their causes, and step-by-step solutions, distinguishing between simple self-repair items and malfunctions requiring contact with after-sales service, balancing safety and practicality.
Startup-Related Faults
- No Response When Powered On, Screen Not Lighting Up
Possible Causes:
External power supply failure, socket/circuit breaker tripped;
Emergency stop button not reset;
Loose power cord, damaged cable.
Simple Troubleshooting:
Check the workshop’s main power supply and the equipment’s circuit breaker, reset the tripped circuit;
Rotate the emergency stop button on the equipment body and cleaning gun clockwise to ensure it is fully released;
Unplug and replug the power cord, check for damage to the cable sheath, and immediately stop using the equipment and replace the cable if damaged.
Note: Do not forcibly reset the circuit breaker if it trips repeatedly, as this likely indicates a short circuit. Contact after-sales service for repair.
System Repeatedly Restarts After Powering On
Possible Causes:
Unstable power supply voltage, poor power cord contact, abnormal system files.
Simple Troubleshooting
Ensure the voltage meets equipment standards (220V/380V). Avoid sharing a power supply with high-power equipment, especially for high-power models.
Secure all power terminals.
Power off and let stand for 5 minutes before restarting. If the problem persists, have a technician inspect the system.
Light Output and Cleaning Effect Faults
Red light is normal, but the laser does not emit light and cannot clean.
Possible Causes:
Safety interlock or door protection triggered;
Damaged/poor contact of the cleaning gun trigger switch;
Laser mode parameters incorrectly adjusted, power set to zero;
Cooling system alarm, laser enters protective lock state.
Simple Troubleshooting:
Check if the equipment protective cover and door are fully closed. An unsecured laser protective door will automatically lock the laser.
Repeatedly press the cleaning gun’s light output trigger to confirm normal rebound.
Enter the control system, verify the laser power and light output mode, and restore the factory preset process parameters.
Check the screen alarm information.Address alarms such as high temperature and water flow first, then disarm the protection before attempting light output again.
Further troubleshooting steps
2. Laser beam output is normal, but cleaning power is weak and dirt removal is incomplete.
Possible Causes:
Protective lenses and focusing lenses are contaminated with dust, oil, or are aged and ablated;
Cooling water temperature is too high, causing the laser to reduce power for protection;
Scanning speed is too fast, power parameters are set too low;
Fiber optic connectors are loose, or the optical path is misaligned.
Simple Solutions:
First, check and replace the protective lens (the most frequently consumed component under mold conditions). Clean the optical lens using special lens paper and anhydrous alcohol;
Check the water chiller temperature. If the temperature exceeds the limit, clean the heat dissipation filter and replace the cooling water;
Fine-tune parameters: Appropriately increase the laser power and decrease the scanning speed. Perform a small-scale test cleaning to verify the effect;
After powering off, reconnect and unplug the fiber optic output connector to ensure a tight connection.
- Spot astigmatism, distortion, spot misalignment, and uneven cleaning area.
Possible Causes:
Optical lenses are dirty or scratched;
Galvanometer position is misaligned, causing optical path misalignment;
The cleaning head has been impacted, causing internal optical path misalignment.
Simple Troubleshooting
- Thoroughly clean the protective lens and focusing lens. Replace any lenses with scratches or burn marks.
- Recalibrate the galvanometer and red light center using the device’s built-in calibration program.
- If the light spot remains abnormal after calibration, do not continue use. Contact after-sales service for disassembly and optical path adjustment.
- Residue remaining after localized cleaning, corners and textures not cleaned properly.
Possible causes: Inappropriate light spot size or scanning spacing, clogged air system, or dirt accumulation.
Simple Troubleshooting: Reduce the light spot size. For deep grooves and narrow textures, use multiple low-speed overlapping scans.
- Check the air blowing device, clean any nozzle blockages, fine-tune the air blowing pressure, and promptly remove any residue.